During this phase, cmake is set to detect the presence of various dependencies and install those ones that are not found in the local library search path.
Within the root of the expanded archive, create a bootstrap_build folder and navigate to it as follows.
mkdir bootstrap_build && cd bootstrap_build
The CMakeLists.txt provided in the project’s root serves the dual purpose of bootstrapping dependencies as well as to compile & install HemeLB.
Hence, the CMAKE_INSTALL_PREFIX configuration can need to be set twice as discussed later.
Inside the bootstrap_build folder, we can now run cmake. Since this is an introductory tutorial, we shall use the Terminal User Interface (TUI) of cmake (i.e. ccmake) as follows
ccmake ..
This shall bring up a configuration like the one shown below.
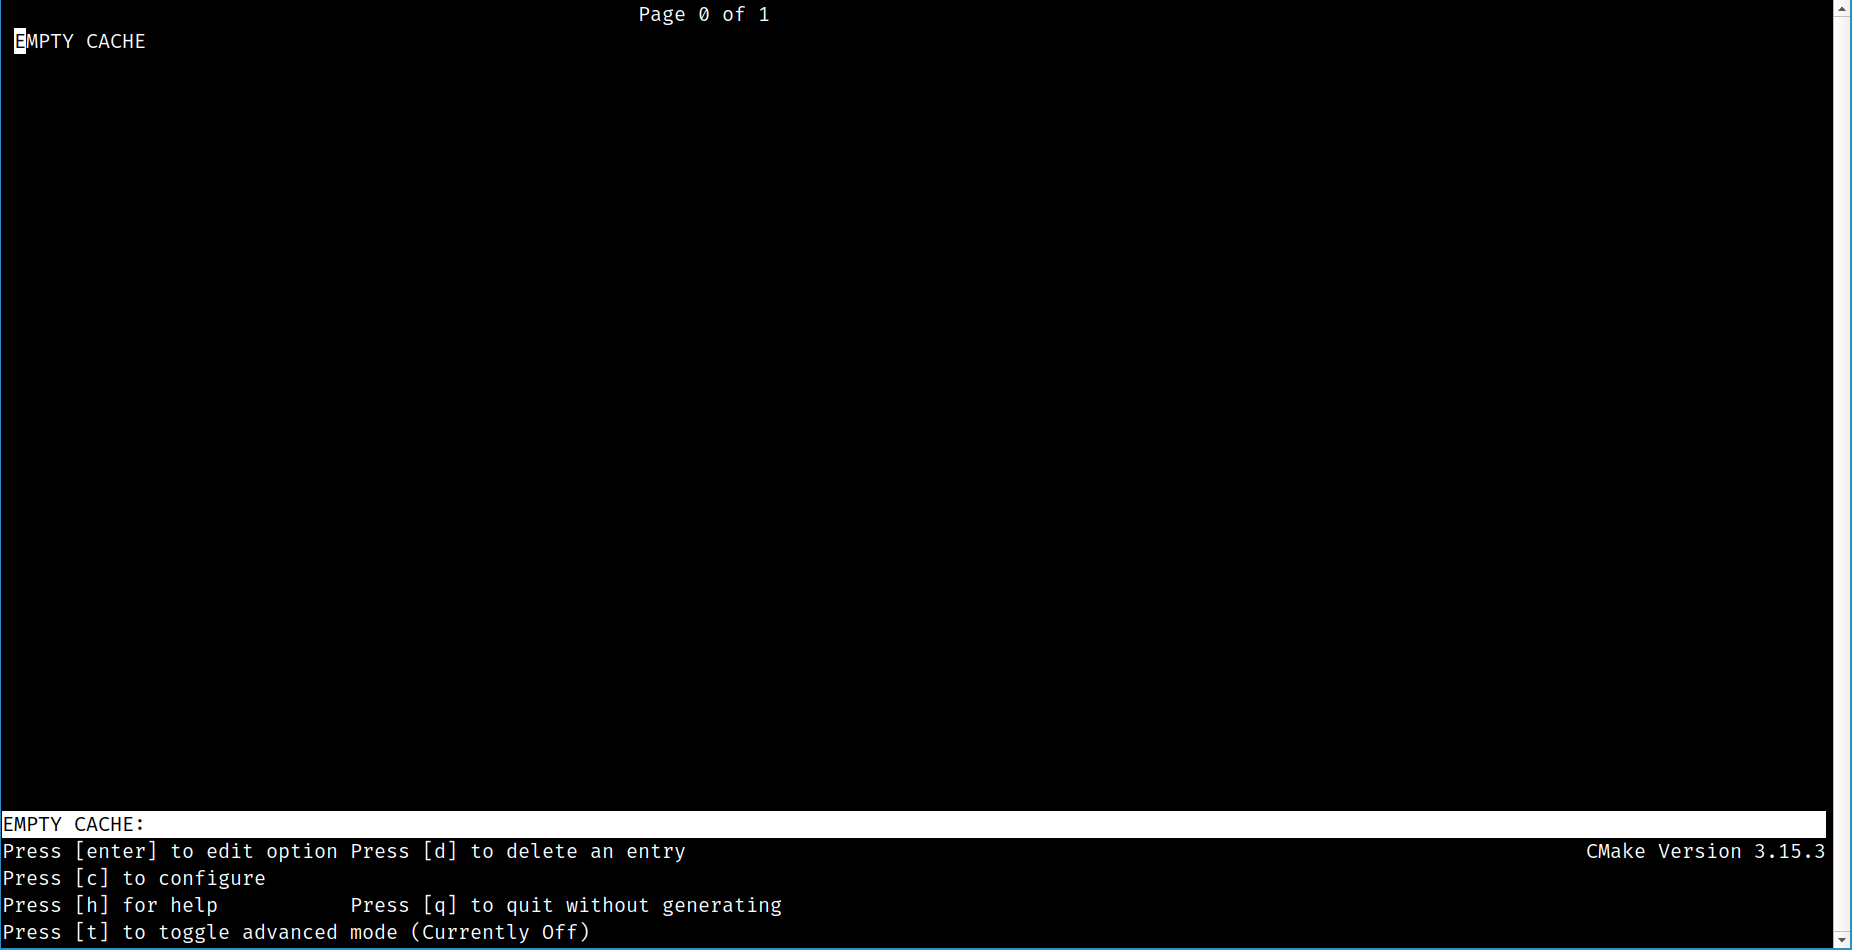
The instructions for using the ccmake are shown at the bottom of this screen.
We now invoke the configure option by pressing c.
This shall begin Cmake’s detection of the platform/architecture, compilers and other dependencies available on the local machine. At the end of the initial configuration, a summary (which might include warning messages) is presented.
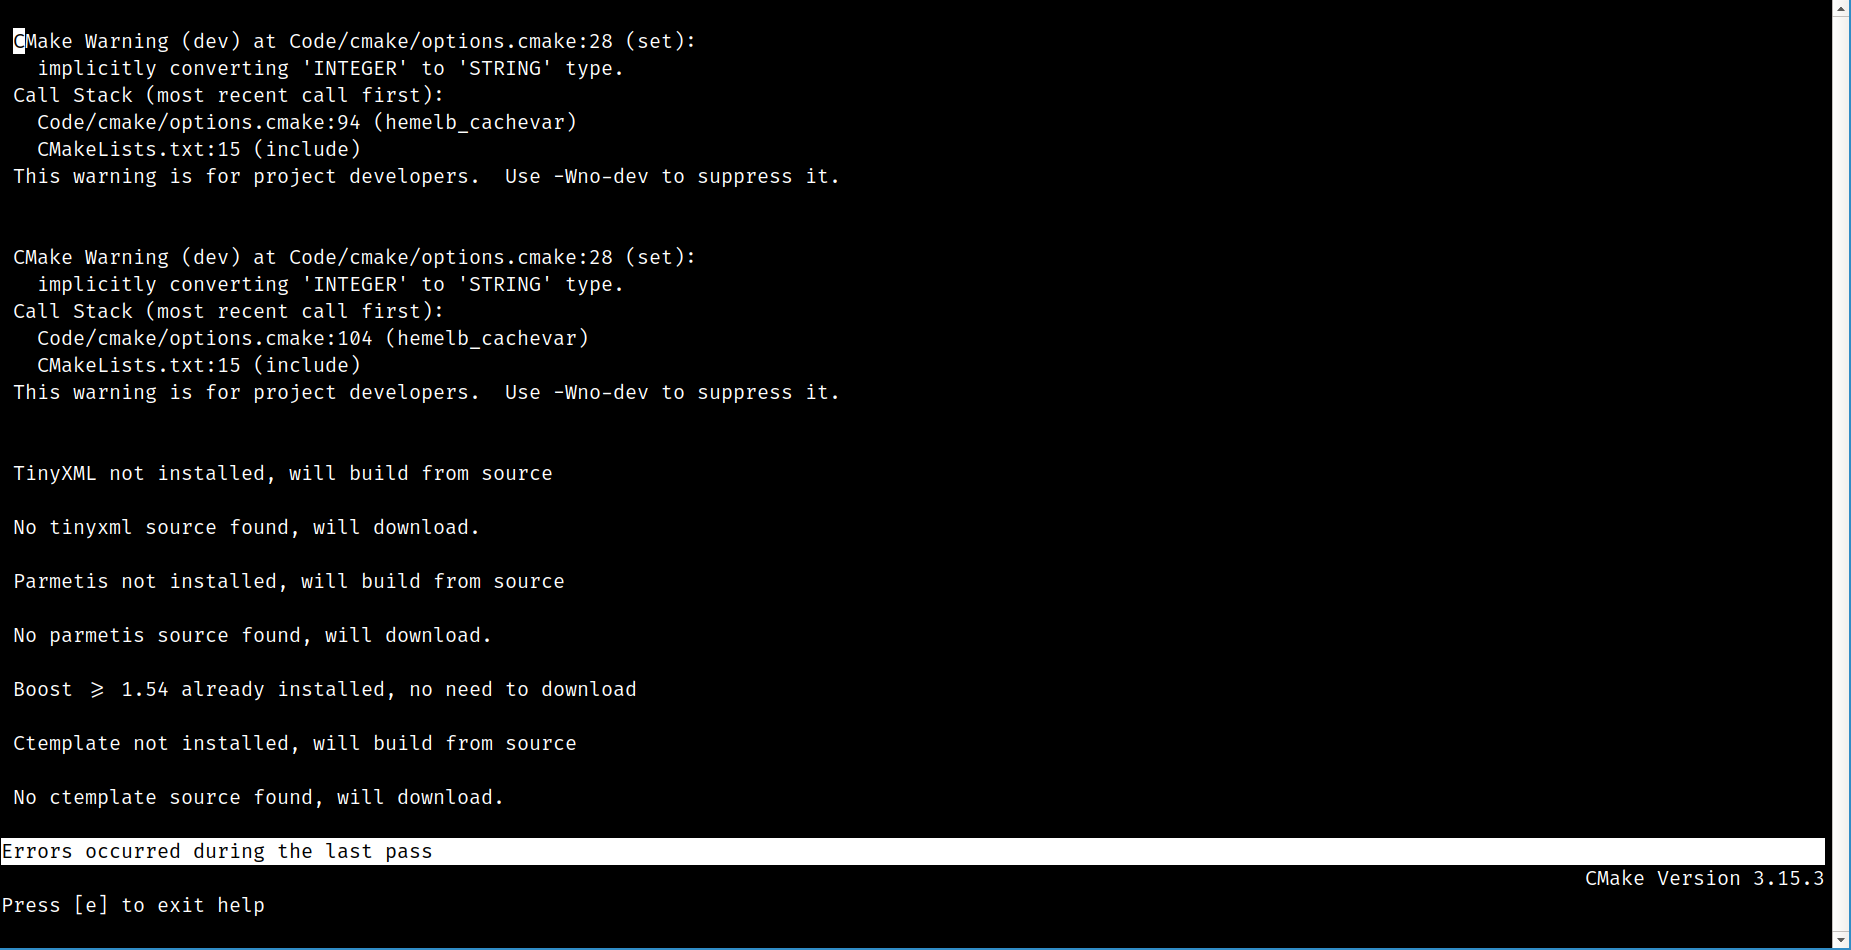
In the specific instance shown here, the compiler found the boost library while rest of the dependencies of HemeLB are to be built. Although the status message claims that ’errors’ were found during the process, these are actually warnings and can be safely ignored by pressing e to exit this screen. This shall bring up the next configuration screen as shown below.
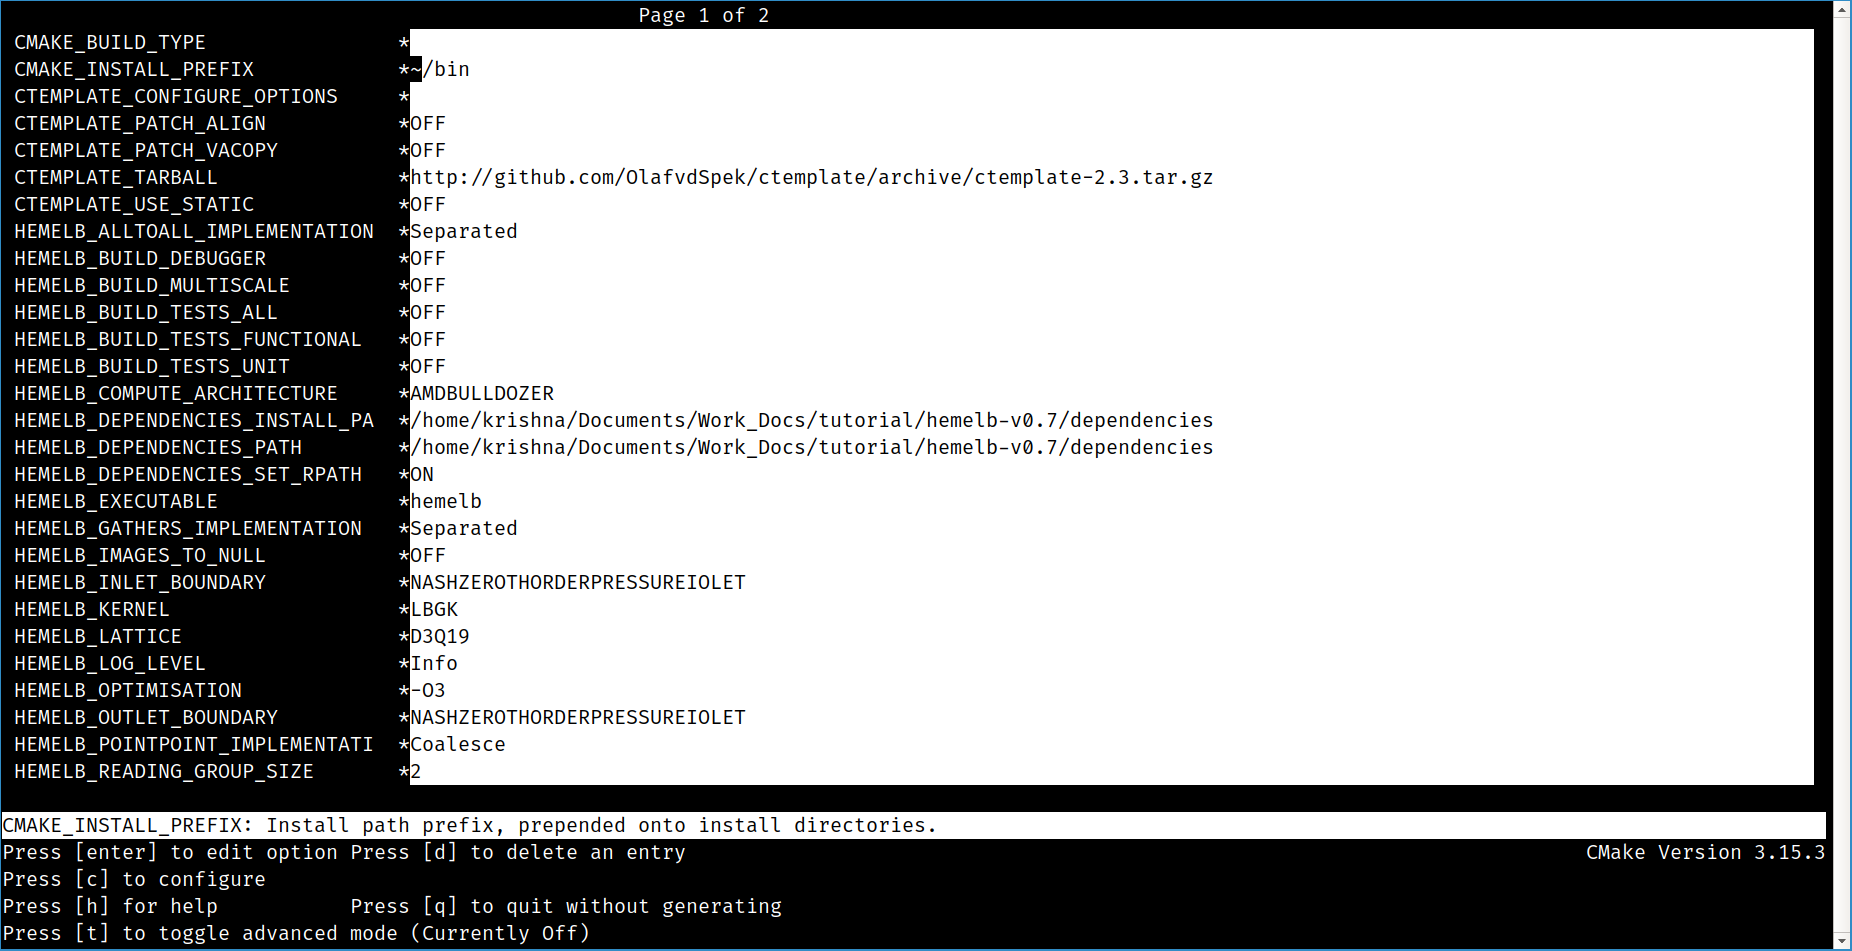
The default settings suffices for a basic install needed to run simple simulations. Advanced users may choose to tune the settings suitably. Note that the only setting that has been changed is the CMAKE_INSTALL_PREFIX which has now been set to ~/bin. This is because the default setting of /usr/local requires administrator privileges. If the bin subdirectory of the user’s home directory is configured to be in $PATH, the hemelb executable can be conveniently run from any other location.
We now instruct CMake to complete the configuration by again pressing c. A summary screen with warnings shall then appear, which can be dismissed by pressing e. The screen that appears at the end of this process is shown below.

This is the first time that the generate and exit option has appeared. Unless
there are any more configuration changes to be done, we may now press g to
generate a Unix MakeFile and exit back to the shell prompt.
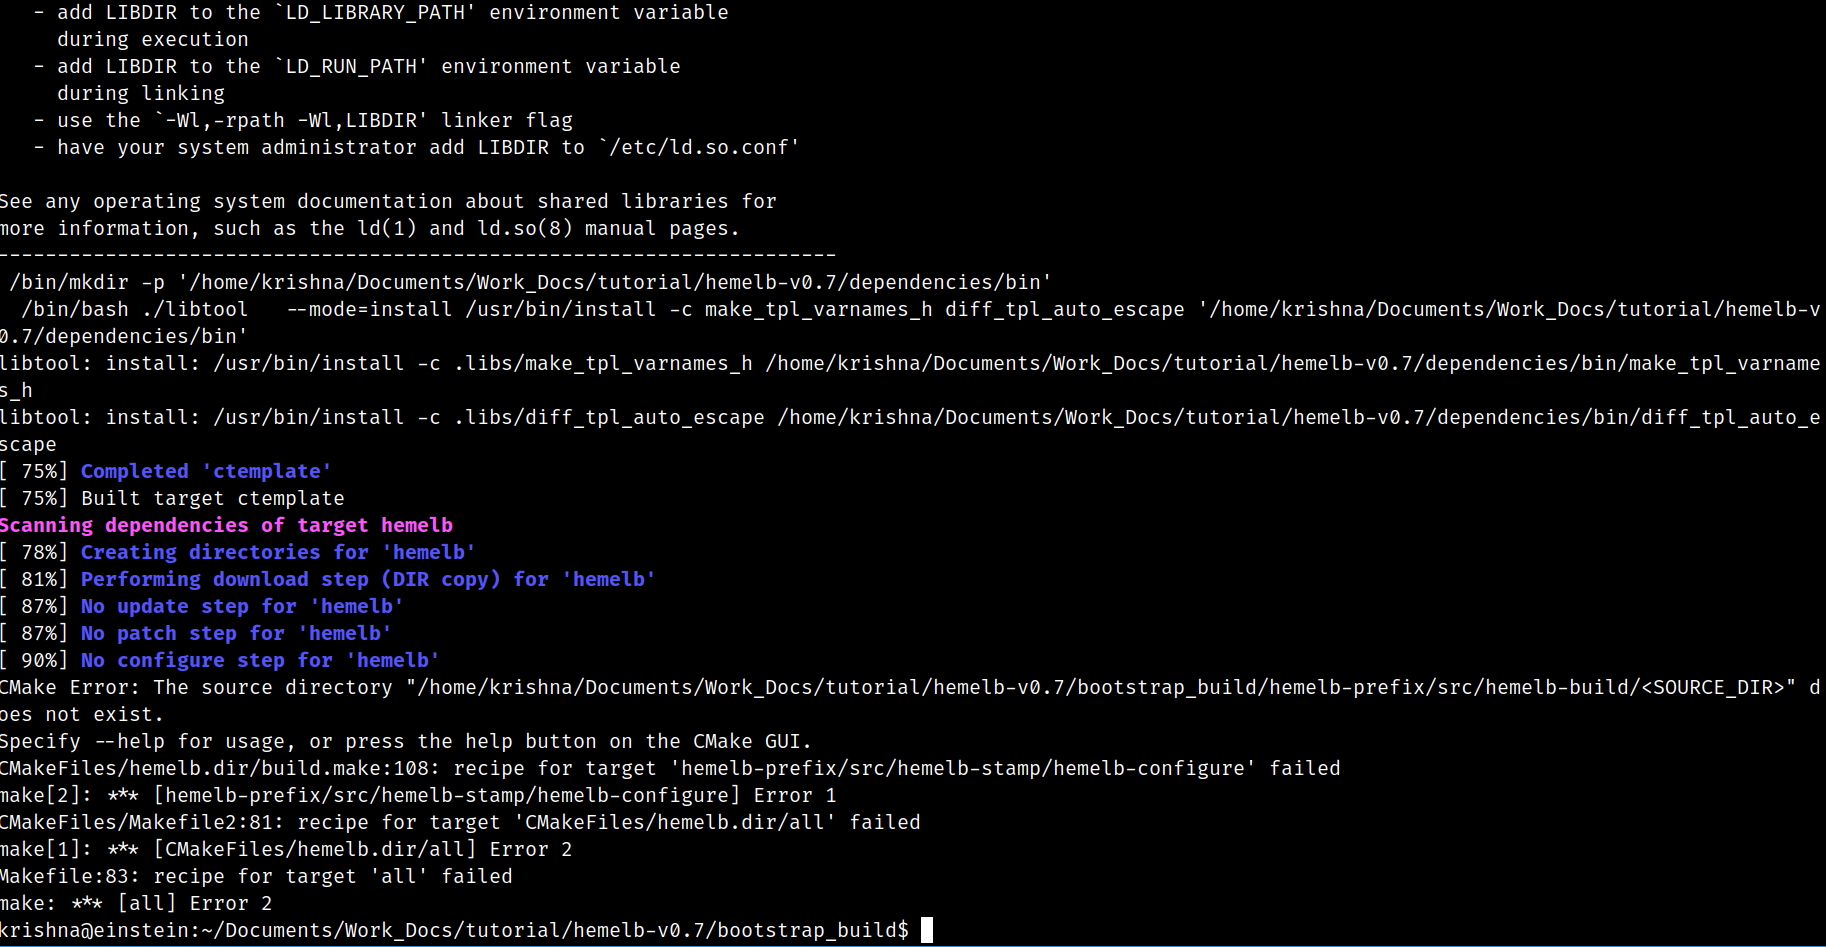
We now invoke make at the shell to compile the dependencies and finish the bootstrap phase. If we have a multi-core machine, then we speed up the compilation by passing -j {NUM_PROCS} flag to the make command, where {NUM_PROCS} is the number of parallel make-jobs to run (and is typically set to the number of physical cores on the machine). For example, on a quad-core workstation, we could do the following.
make -j4
Towards the completion of this step (at about the 90% mark), an error is thrown indicating that a particular directory is not available. This is an idiosyncrasy of the code/build toolchain and can be safely ignored. A screenshot of the final output of this stage is shown below.
It is important to cleanup the cached files and other build artifacts. The easiest way to do this is to remove the bootstrap_build directory as follows.
rm -rfv bootstrap_build
Next step
Having completed the bootstrap phase which installs all dependencies, we proceed to actually compile and install Hemelb.